

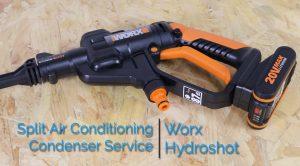
 The Worx HydroShot is a great tool to use to clean your split air conditioning condenser. It offers a good deal of pressure with absolute convenience. With a max output of 20v, it offers unparalleled manoeuvrability, flexibility and power when needed. And not just for your air conditioner’s condenser.
Powered by a Lithium-Ion battery, its portability and slim, lightweight frame enables the users to clean in deep nooks and crannies that otherwise would be very hard to get to without worrying about hose length. Not only that, at up to 320lbs of pressure the HydroShot is powerful enough to get rid of deep, ingrained dirt but not too powerful so that it damages your paintwork or the fins on your unit. That’s typically a common problem with pressure washers as they can be too powerful and damage your items.
The cordless design of the HydroShot enables to user to use anything from a pond to a bucket as a water source so that you don’t have to be connected to a tap or hose output.
In this tutorial done by one of our team members, we at ECS are going to show you how to use the Worx HydroShot to clean the air conditioning condenser unit so that you have the knowledge on how to maintain it regularly. This not only can save you money but it allows the unit to run at its full capacity without “choking” itself and having to use more power to compensate for inefficiency. Although we offer Air Conditioning Repair, it’s always best to maintain your split air conditioning condenser to ensure maximum efficiency and reliability.
Charge It Up
Of course, we start this tutorial off by telling you to make sure that the 20V battery is fully charged before the operation. There’s nothing worse than a flat battery just when you’re about to clean the condenser, so make sure it’s on charge the night before! You can check the charge of the battery pack by pressing down on the battery-check button located at the front. For a big clean, you’ll want a full battery.
Set It Up
Before we start on the split air conditioning condenser we obviously have to set the Worx HydroShot to suit the situation at hand. Since we’re working on a condenser with thin, delicate metal fins, we need to make sure we have enough power to take off stubborn dust clumps and debris while keeping a wide enough spread to make light work of the cleaning process.
Once you’ve clipped the battery to the bottom battery slot of the Hydroshot and checked its charge, you can move onto setting up the lance and nozzle to optimise it for pressure. This is a relatively simple and easy process but we’ll go through everything with you so that you’re doubly sure.
The Main Components
You’ll have 5 main components during assembly – short lance, long lance, 5-in-1 pressure nozzle, battery and hose. Assembling the lance and nozzle optimised for pressure to do a deep clean is key in making sure the condenser is spotless. The 5-in-1 pressure nozzle attachment at the end of the lance. Allowing you to choose from 5 pressure settings, select from single degree direction to wide-angle 45-degree spray. The settings recommended for the best clean are, to begin with, the widest settings at 25 or 45 degrees to give the deepest clean possible.
Get your short lance and slot the 5-in-1 pressure nozzle into it by pulling back the brass ring and letting it slide back up once its connected, locking it in place. You’ll then want to slot the short lance with the nozzle attached into the long lance. Do this by aligning the short lance to the slot in the long lance. Push it in and twist so that it locks in place.
Attaching the assembled lance is easy. Insert the assembled lance into the slot in the Hydroshot and twist again to lock it. Battery connected, lance assembled and setting chosen; you’re almost ready.
Connect The Hose
Next, connect the hose to the Hydroshot. After all, you can’t use it if it’s not connected to a water source, can you? Another simple process by simply slotting the orange connector to the bottom of the Hydroshot and clicking it into place. The other end of the hose is going to be placed into a water source to draw the water of course. Complete with a filtration system to get rid of any impurities that may impact the performance of the Hydroshot.
When choosing your water source, do not use anything other than clean, freshwater. Anything else is prone to damaging the Hydroshot inside. This is also important for being as clean as possible for the split air conditioning condenser. In our walkthrough, we’ve chosen to use the foldable bucket included with the Hydroshot and just normal tap water. USe the soap dispenser attachment if you want to use a cleaning product. Attach it to the end of the lance so it doesn’t clog up the pump inside.
The Worx Hydroshot is all set and ready to go. Now let’s prepare the split air conditioning condenser unit for cleaning.
Disconnect the Split Air Conditioning Condenser Unit from the Power Supply
One of the most important things to do when cleaning any electrical appliance is to make sure it’s disconnected from any power source! If you don’t, you’ll be in for a nasty shock – literally. Take the plug out of the wall outlet or alternatively use the breaker unit. Just be sure there’s no electricity running to the unit before cleaning begins.
Unscrew Air Conditioning Unit
Unscrew the 3 main screws to the top lid of the unit to get inside and see how clogged it is from within. Once you can see inside you can assess how much cleaning needs doing and if you need to wipe anything down. This is also to make sure that the lid doesn’t obstruct during the cleaning process and drying process. Simply use a Phillips head screwdriver to unscrew 3 screws located on the front, left and right side. Then lift the lid off. When lifting the lid, be careful not to do it too rough as that may damage the fins underneath.
Preparing
To begin cleaning, you need access to the back or inside of the condenser unit. This is because the build-up of debris will clog up the metal fins. When you’ve got access to this, either by using a ladder to see over the top or disconnecting the unit entirely, gently wipe down any tough spots that won’t be cleaned by the Hydroshot. There is minimal prep needed, but it’s necessary before you start cleaning the split air conditioning condenser.
The Fun Part
So the power has been disconnected, the lid is taken off and Hydroshot is set up. Now is the fun moment you’ve been waiting for – the spray down! Set the nozzle to the 45-degree setting and high power (located at the top) for the first initial sprays. This is to loosen up most of the dust bunnies and debris that has built over the months or years. Depending on the climate and how long you’ve not cleaned the condenser, everyone’s condenser will vary. Spray down both the wide back of the condenser and the side(s) to get as much as possible. We want this to be as good as new, or as close to that as we can.
Once you’ve done the main spray down, you can shorten the angle on the pressure nozzle to concentrate the pressure in those persistent dirt-filled nooks and crannies. You may turn down the pressure setting from High to Low and use the settings that suit the current task.
Done
Once you’ve completely cleaned the condenser as much as possible, its time to let it dry for 1-3 hours depending on the weather. We recommend leaving it for around 2-3 hours to dry. Then reattaching the lid so that minimal bugs and debris can get inside it.
Pop the lid back on when you’re finished and screw it in. You’ve just successfully cleaned the condenser to your split air conditioning unit.
Remember Maintenance!
It’s incredibly important to service your air conditioning unit regularly since if it becomes too clogged up you will have inefficiency in its operation which will cost you more to run, or end up paying a small fortune for it to be repaired. Just save yourself the hassle and get it serviced regularly – it will save time and money in the long run.
Let’s start work on your next project by using our instant air conditioning installation quote – Click Here to get your quote today.